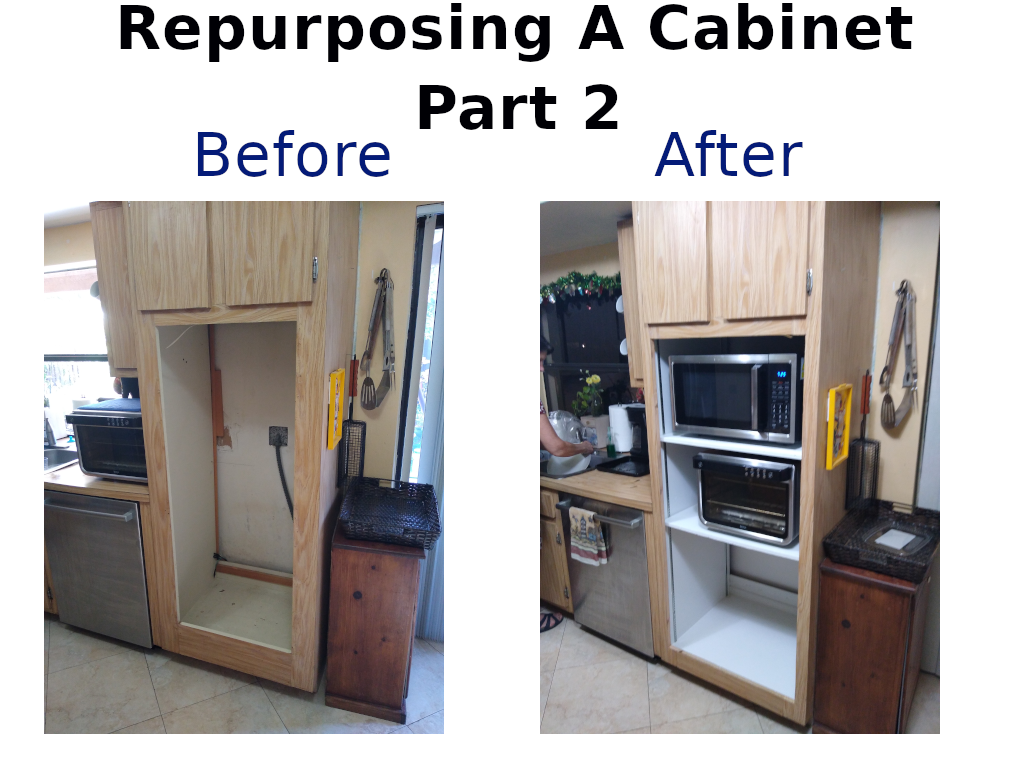
Re-purposing a built in oven cabinet part 2
In the previous episode we had already done most of the hard work. We removed the old oven wiring, Installed outlets in place of the oven wiring and painted the inside of the cabinet. In this episode we are installing adjustable shelving rails, cutting plywood shelves, and painting the shelves to match the cabinet.
Installing the Rails
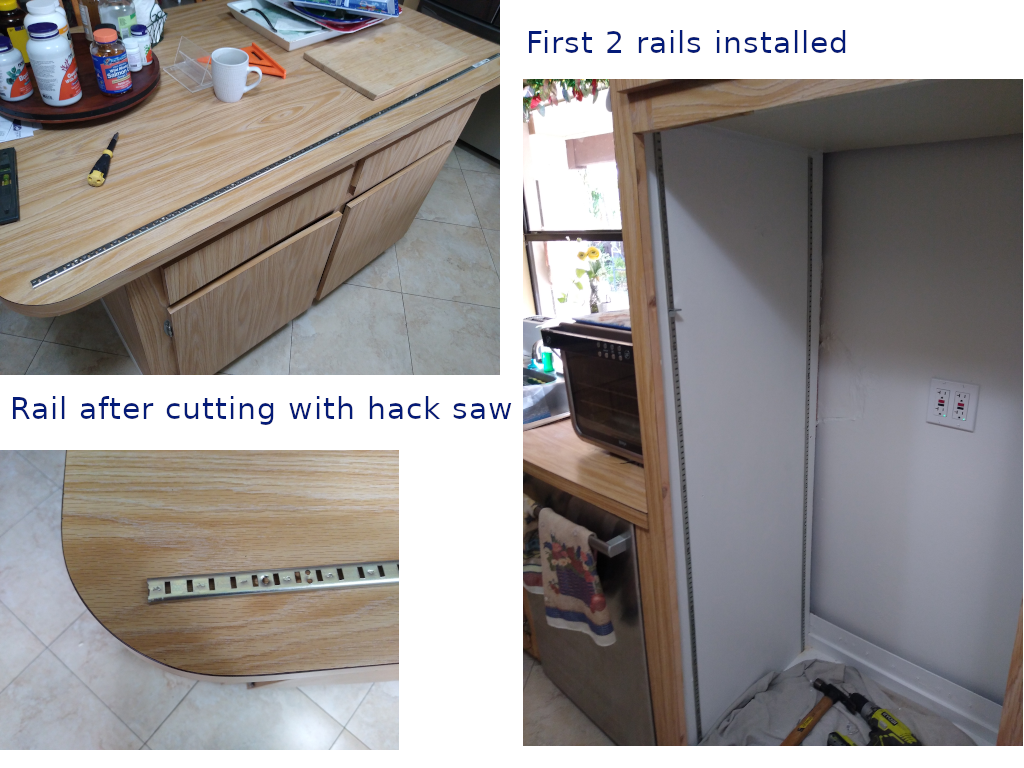
Installing the rails was a little more difficult than I expected but it went pretty smoothly for the most part. First step was to size them. I bought them a little long on purpose because I wanted to make it as easy as possible to install. The most difficult part is making them plum. But by making them go all the way to the bottom of the cabinet I was able to use the bottom of the cabinet to help. What I learned in the process though is that it does not matter because if you hang them from the top screw they will plum automatically. I used a level to double check as I added the first 2 screws and then the rest were simple. I also measured the distance from the front of the cabinet 2" to the first rail and for the back rails 2" as well from the back of the cabinet to make them uniform.
Cutting the plywood Shelves
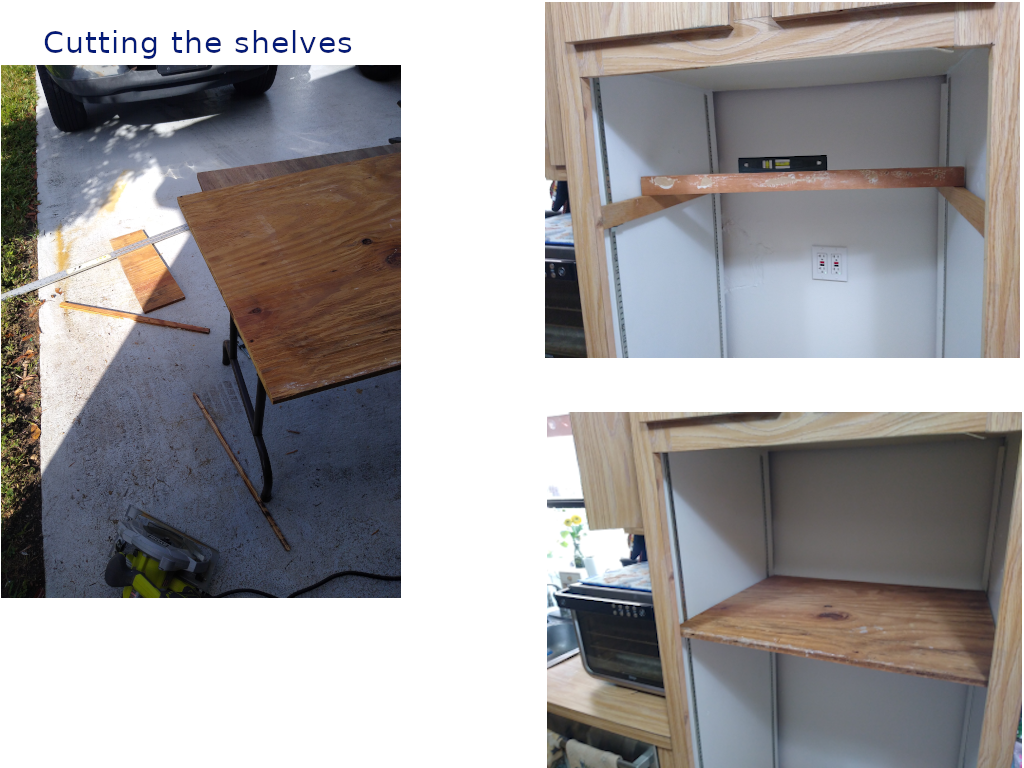
Because the shelves are not screwed in they are just placed above the rail pegs they need to be a tight fit. I put the rails 2 inches from the front and from the back which allows for some play. If for example the shelf was too short it would be able to slide forward and fall off the rear peg. I had to cut an additional 1/4 inch from the first shelf because my measurements were a little to wide. In the images above at the top right I am checking if the rails are level.
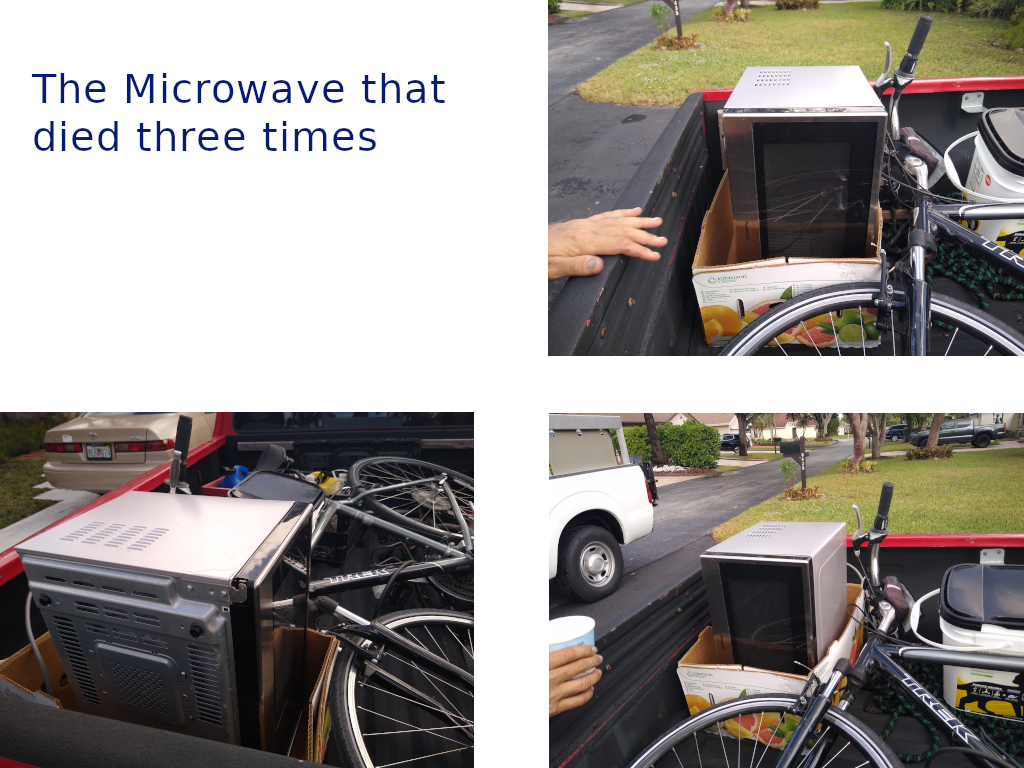
Microwave Coffee Break Funeral
I took some pictures of the dead microwave while taking a break. This microwave was probably a health hazard. Every few years it would stay on after you heated something and you would have to unplug it to turn it off. We were able to revive it by allowing it to rest for a few days. Every few days we would plug it in to see if it would turn on. If it turned on it needed more rest. Twice I opened it up and unplugged and replugged some wires inside and it came back to life. But this last time it broke soon after the repair so bye bye dangerous microwave! If it was not for this happening I would not have done this project. lucky me!
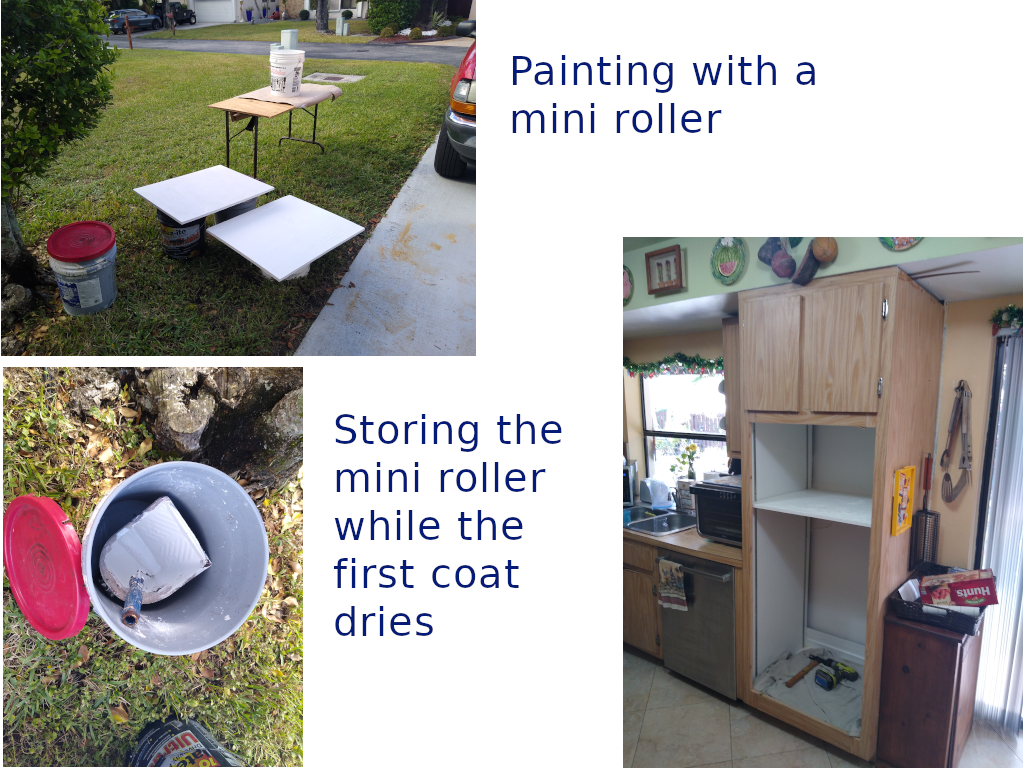
Painting the Shelves
I painted a few kitchen cabinets, drawers and doors in the past, so I applied the same technique. The mini roller is the perfect tool for this. I like to paint on a table so I don't have to bend over so much and then I put the shelves on a bucket to dry. I leave the roller in the paint cup inside a 5 gallon bucket with a lid on it to keep the paint fresh while the first coat dries.
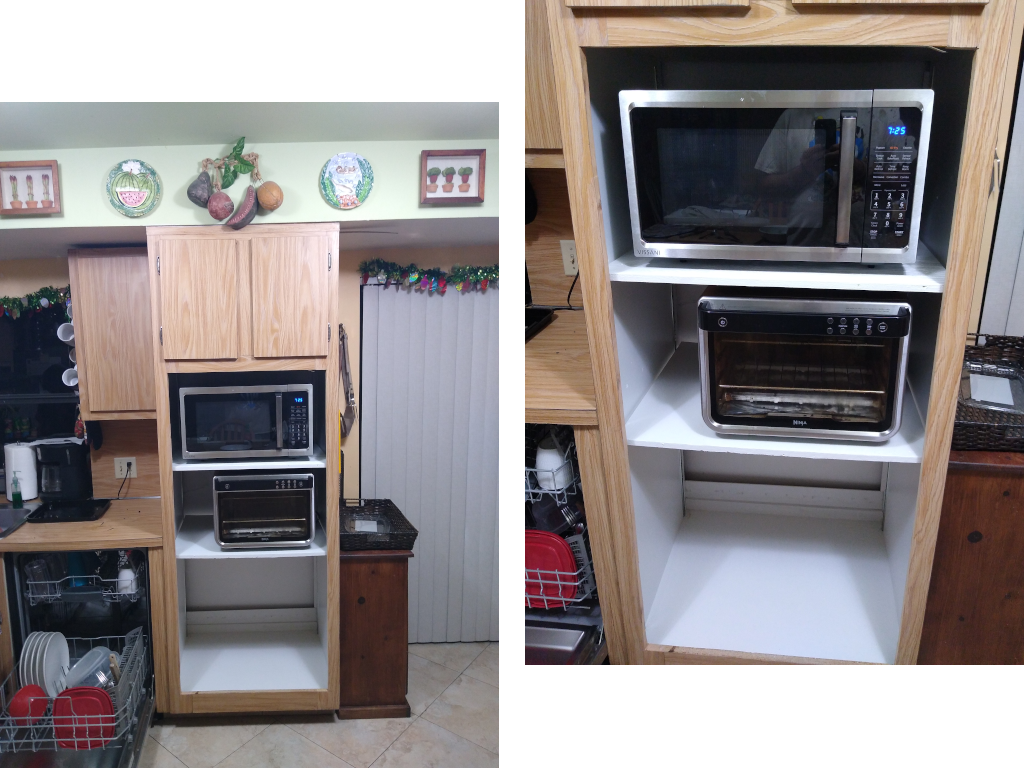
Cabinets and Shelves Strike a Pose
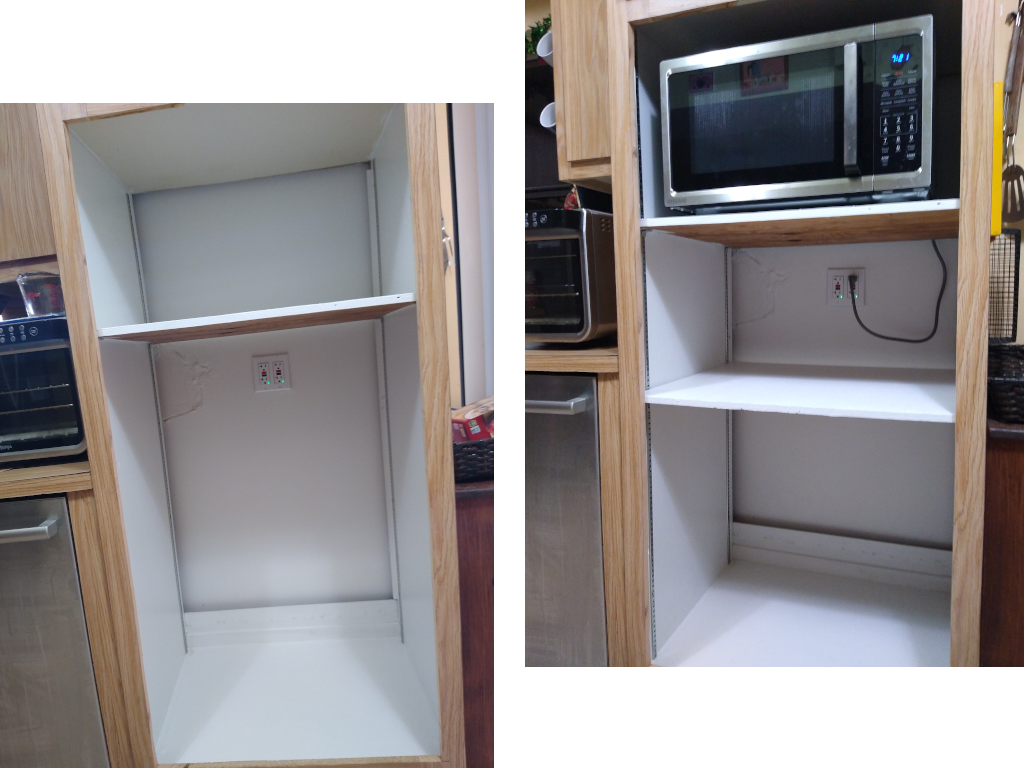
So here are some pics of the shelves completed. The part that is the most stunning about this project however is the amount of counter space we now have. Feng shui level up for sure. It is a small kitchen so there is not must space to start with. This is a great way to make better use of space in your kitchen especially if you are on a budget. It can make your kitchen more organized and you can buy whatever types of appliances you can afford. If you decide in the future to buy a built in oven, there is no problem because the wiring in the wall has not been altered much and the breaker box has not been altered at all. Other details that I did not mention is that these are counter top ovens I am using and they need ventilation. This shelf system allows air to flow on the sides and in the back in this case because the cabinet is open to the wall. So take this into consideration if you decide to do a similar project.